


Michelangelo did it upside down, 200 feet up – is it hard to prepare my artwork?
Good Lord no, not at all…put simply there are Tifs, gifs, AI files, Psd’s, Pdf’s, jpegs, wing dings and sherbet dib dabs…layers, tools, clipping, and trapping and, and, and, and, er…resolution…what could be simpler? All you need to do is become a Grand Wizard of The Order of Photoshop, and you can present your designs in the crisp format required by your lovely textile screen printer, a two minute wait, a ping, and out pop your stunning T-shirts…don’t they?
Well, no, and what follows again is only my view, there are those who will disagree, but unless you have more hours on your hands than a time traveller on the dole, or at least did a few graphic design modules at school, I would think carefully before attempting to master the dark and digital arts.
Why not, it would be like, well handy wouldn’t it? Yes it would, but while you’re spending eight months trying to put your design into layers in the back bedroom, growing a beard, and farting your pants into smouldering tatters, you could have got someone who knows what they’re doing to sort it, and actually be out flogging the stuff.
Self interest, am I about to offer to do it for you, for fifty quid and a packet of Hob Nobs? There is an artwork department here who can, but not me – I tend to keep fairly quiet on the design software subject, as the man who thought that ‘rasterizing’ had something to do with Bob Marley.
What basics do we need to know though, to not waste time cropping the wrong bits off?
Resolution, you need plenty of it – at least 300 dpi’s at the print size, so loads of dots per square inch, or your artwork will look really edgy and not have nice smooth lines. The ‘at the print size’ bit is important – it means you can’t do your design at a really good resolution at the size of a postage stamp, and then want to print a parachute for a charity jump, because your 300 dpi’s will suddenly become bugger all dpi’s, when you blow up the size of the finished print…not enough dots in there, and so suddenly all jaggedy again, like it might have been drawn by a large drunk man in welder’s gloves, holding a small pencil.
This means I’m afraid, that not just for copyright reasons, you can’t go nicking stuff of the internet…it would be nice if we could Google ‘Top T-shirt Designs,’ ‘Massive new fashion label, and ‘Wake up with a super model under a pile of cash in Paris’, and it would all just happen, but generally they’re only 72dpi, and not ideal for print.
Resolution is even more important because of what we’re printing onto – a textile is in print terms, as rough as your Granddad’s chin. We don’t get the lovely smooth glossy paper that your shandy drinking Litho printers get to work with, no wonder they get a nice print finish – no, a textile is a bunch of holes, that will break your dot up if you’re not careful, making the print finish look like a 1970’s holiday snap.
And what’s that someone said about layers? Well that’s how we print most of the time, separating each colour out into a layer in the artwork software thing, so that each colour can have its own screen on the print machine, although not always…sometimes we go all CMYK (cyan, magenta, yellow, black) and mix a load of dots together to create all the colours of a Christmas jumper. Generally if you want strong punchy colours though, save your artwork as separate solid layers, unless it’s a full colour picture, where you’re going to need the CMYK’s to get all the colours, sometimes called four colour process.
But what does layering artwork involve? Here’s a fascinating excerpt from an online tutorial…
Go into the backup layer (Layer Image 1 Copy) and select the blue shape. Copy the shape (Command + C). Switch back to the working layer and paste the shape in-front (Command + F). Make sure you hide the backup layer and select the working layer (top layer). Select the shape. Holding the option key select subtract from the shape area again in the pathfinder palette. Select the shape again and paste a copy in back (Command + B). Select the larger background shape and select the subtract from shape area button….BANG….oh I’m sorry, I’ve just shot off my left testicle… I’m not being much help am I, but I’m afraid I find it about as fascinating as a craft show, and thank god for Phil, my very clever artwork man.
What else before I go and watch some paint dry…oh yes, ‘Can my screen printer help if I just send in a drawing?’ They can indeed…someone once said to me ‘Yes, hurrah, I have my artwork ready!’ and promptly sent me a photo from a phone, of a biro drawing, onto lined paper, that they had just sketched in a traffic jam on the way to see me. One of the lads in the artwork department tried to poison my tea, but it all got printed nicely in the end.
Have I put you off dabbling yet, still want to play with your magic wand tool? Then I will put you onto John Rainsford at the link below. I’ve never met him, but he seems like a damn nice chap to me, solid, Irish, and with a reassuring name…he tells it better than me…I love temperamental old cars more than life itself, but I’m no mechanic…
http://www.smashingmagazine.com/2010/12/07/preparing-artwork-for-screen-printing-in-adobe-illustrator/
 Artwork Origination
  Cap Manufacture
  Design Consultancy
  Embroidery
  Fashion Photography
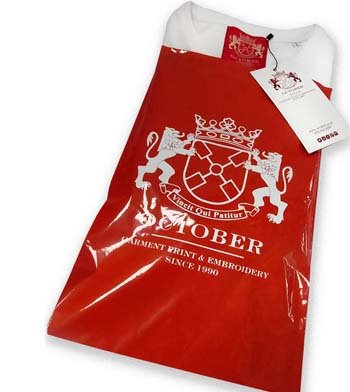
  Garment Bagging
  Digital Printing
  Garment Manufacture
  Garment Sourcing
  Relabelling and garment finishing
  Screen Printing
  Watch us screen print